Data Science and AI | Topics
Why you should care about Data Centric AI Rens Dimmendaal 10 Mar, 2022


In a Data Science project, the most common approach is to write a sequence of scripts to explore the data, develop statistical models and show the results. After a while, our code can get easily out of hand because the scripts are too many (and/or too long), and we might face problems such as:
Packaging our code addresses all of the above, because it’s easy for collaborators to install a package as any other third-party library, we can easily write a manual for our code, and we will be able to re-use many functions we defined previously, just by importing it with library('mynewpackage').
Therefore, this hands-on guide introduces the essential tools and best practices to build an R package from scratch. The following content will be clearer if you have at least some exposure to Continuous Integration / Continuous Development concepts. A minimal example, but complete with respect to the topics that we are going to cover, might be praise, or its furious newborn little brother curser.
Creating and managing a package/library can be done from the R console; alternatively, you can execute short R scripts as strings:
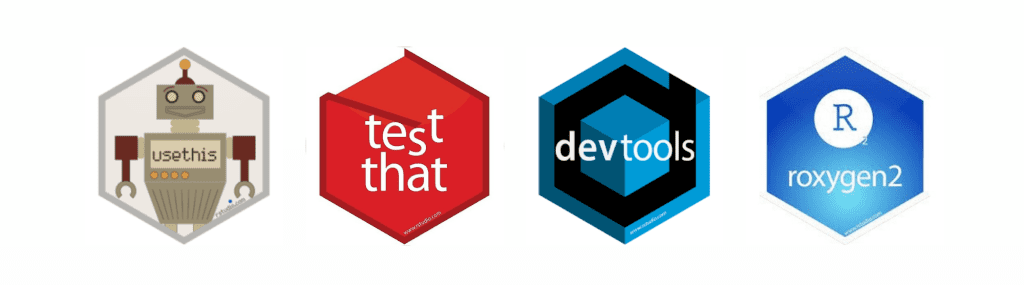
$ Rscript -e '<R code>'In order to develop a new package, the following libraries are required, or at least useful.
usethis, and it adds extra ones as wellMore on each of them later, but for know we could prepare our environment by installing them with the following command in our R console:
install.packages(c("usethis", "devtools", "testthat", "lintr", "roxygen2"))If you are familiar with Docker, you can decide to develop inside a container to isolate the environment. Great Docker images can be found at the project Rocker, and in particular the image rocker/tidyverse already includes the dependencies described above, in addition to the complete tidyverse ecosystem (it’s quite a big image). I find this, in combination with the possibility of developing inside containers with Visual Studio Code, a very good setup, as it is highly reproducible on any machine and it isn’t specific to R.
Let’s start to create a package that, for lack of a better name, we will call analytics.
The first step is creating the folder that will contain it. With the function
usethis::create_package("path/to/analytics")we will create a folder called analytics that will contain a blank package structure.
NOTE
If you are doing this within a git repository, you might get a complaint because usethis expects the folder to be a git repo. However, I think that this choice should be up to the developers’ opinion and use case.
At this point, the analytics folder should have the following content:
R folder. This is where the .R files with your code are going to be.DESCRIPTION file. Metadata about the package, such as name, version, author, required and suggested dependencies. You can also specify the license, and there are quite handy functions such as usethis::use_gpl3_license("path/to/analytics"), that can fill in the information for you. You will find LICENSE.md in the root folder of the package.NAMESPACE file that describes the imported and exported objects. It is not supposed to be modified by hand, and it will be managed by roxygen2..Rbuildignore file. As the name suggests, you can specify what files to ignore while building the package. It is not created automatically from the beginning, but you might find it as a byproduct of some of the previous steps, for instance creating the license file.We are now ready to add some code to the package. All the .R files with the code needs to be in the R folder, because every file inside a sub-folder of analytics/R will be ignored. Suppose we need a function to aggregate the monthly spend of each customer from a data set with transactions. We’ll have for instance:
calc_monthly_spend <- function(transactions) {
  transactions %>%
    dplyr::group_by(customer_id, month) %>%
    dplyr::summarise(monthly_spend = sum(amount))
}
This could go into a file named path/to/analytics/R/calc_monthly_spend.R. Giving the file the same name of the function makes it easy to find where it is defined, but there should be a trade-off not to have hundreds of files.
We also want to be nice people and document the code that we write. The package roxygen2 provides a framework to write documentation of objects next to their definition and creating a manual that can be for instance accessed by calling the help function on the desired object.
Going back to the example above, we complete it with a roxygen2-style description:
#' Calculate monthly spend #' #' A more extensive description #' #' @param transactions <code>data.frameA data set with transactions indexed by customer and month #' #' @returndata.frameA data set with aggregated monthly spend per customer #' #' @import dplyr #' #' @export calc_monthly_spend <- function(transactions) { ... }
After the title and a more extensive description (optional), we see the code>@param and code>@return tags to describe input and output. Dependencies should be specified with either code>@import to import a full package, or with a lighter version @importFrom packagename functionname to import only a specific function or object. Finally, the code>@export tag tells the package that this function will be public, and can be called after having imported the package with import or with the double colon, as in package::calc_monthly_spend. Functions/objects that are not exported can be still accessed in a similar way, but with triple colon :::.
Now, we can build the documentation by calling
devtools::document("path/to/analytics")Two things will happen: a folder path/to/analytics/man will appear, containing an R-markdown file with the function’s documentation; the NAMESPACE file will be updated to specify the dependency on dplyr and the exported function calc_monthly_spend.
Let’s see if that worked out. We can load our development package without building it in an R session with devtools::load_all("path/to/analytics"), so that it will be imported as if it were installed and imported with library(package). We should be able now to look up the documentation of the function we defined with help(calc_monthly_spend).
The DESCRIPTION file, however, needs to be updated manually to tell the package that it depends on dplyr. For this we need to add a new tag Imports, and the result will look like this (more packages imported as an example):
...
Imports:
  dplyr (>= 1.0.0),
  tibble (>= 1.0.0)
You can fix a specific version of a dependency, or use inequalities, but to the best of my knowledge, there is no way to specify a version range or to fix only the major version.
Finally, we can add documentation on the package level in a separate file, possibly named after the package itself. Here’s an example:
#' Package
#'
#' Aggregate customer data and create amazing reports
#'
#' @docType package
#' @name package
"_PACKAGE"
Don’t forget to call devtools::document("path/to/analytics") to update the documentation (I always forget, with resulting failed builds).
Including tests is never a bad idea. With unit tests we have more confidence that the code we wrote is doing what is supposed to, even if on a relatively small but representative subset of cases. The quickest way to set up the testing component is to call
usethis::use_test("path/to/analytics")from the folder where you want the tests to be created, typically the package folder. You will find some new folders and files, such as:
analytics
├── ...
├── tests
│   ├── testthat.R
│   └── testthat
│       └── test-package.R
The testthat folder is where we need to put the .R files with the tests, prefixed by test, while the testthat.R file is automatically generated and contains basic setup of the testing framework.
A test is defined as a function call of testthat::test_that(description, code), given a string with the description of the test and a code block as a second argument. The package testthat provides functions to test equality on several levels (also with tolerance in case of floating-point numbers) or functions like testthat::expect_true that can test the truthfulness of any boolean expression.
Here’s an example of a test for our new function calc_monthly_spend, that aggregates transactions per customer and month. We create a small data frame with some fictitious transactions, that we can aggregate by hand, so that we create the intended output. The output of the function is compared to the desired one:
test_that("calc_monthly_spend works", {
  transactions <- data.frame(
    customer_id = c('A', 'A', 'B', 'B'),
    month = c(202101L, 202101L, 202101L, 202101L),
    amount = c(100.0, 200.0, 10000.0, 100.0)
  )
  desired_result <- data.frame(
    customer_id = c('A', 'B'),
    month = c(202101L, 202101L),
    monthly_spend = c(300.0, 10100.0)
  )
  calculated_result <- as.data.frame(package::calc_monthly_spend(transactions))
  test_that::expect_equal(desired_result, calculated_result)
})
Now that we have a basic test for the only function in the package, we can run it with
devtools::test("path/to/analytics")Hopefully, everything will be green!

By linting is meant the process of finding stylistic errors in the code, potential bugs or choices against some predefined conventions. A common example is enforcing a limit to the line length, because limited lines improve readability. The devtools package can also automate a lot of checks in the code and in the package metadata. This is simply a matter of executing
devtools::check("path/to/analytics")which will also execute the unit tests, so that there will be no need of calling devtools::test separately.
You can also extend the code analysis using the package lintr. To check the full package, you can call
lintr::lint_package("path/to/analytics")As you might expect, you can customize the linting settings by creating a .lintr file in the package directory. There is plenty of linters that you can set up (see lintr on github). As an example, we might want to customize the maximum line length, to ensure every object name is in snake_case and we want to disable the requirement of double quotes for strings. This minimal .lintr file will look like this:
linters: with_defaults(
  line_length_linter(120),
  object_name_linter(styles = "snake_case"),
  single_quotes_linter = NULL
  )
A final note: it is not necessarily a problem for the next step, but the .lintr file name can be included in .Rbuildignore to avoid potential issues (for some versions of your dependencies).
The last step for this tutorial shows how to build the source code of a package. This means that we will end up with a single .tar.gz file with which we can install the package we developed. The pattern is the same as usual:
devtools::build("path/to/analytics")You can also specify the optional argument path to define where the source code will be saved.
That’s it! Now you can install the built package from the source file, by calling
install.packages("path/to/analytics/analytics_0.0.0.9000.tar.gz", type="source")and it will be available for standard importing.
In this tutorial we shown how to create an R package that we can share and re-use for future purposes. Including tests and code analysis we get some proof that our code is behaving as expected and sufficiently readable. Including documentation helps other users (or your future self) to quickly understand how to use functions and objects belonging to the package. Continuing from here, you might want to automate all your checks within a CI/CD pipeline, and the package usethis includes functions to create template pipelines for the most used tools.

